Showing posts with label tutorial. Show all posts

Wednesday, April 13, 2011

How to - Decorative Jar Lids

I use recycled jars a LOT. They are great for storing small things, and ... assuming you're as crazy about spaghetti sauce, pickles, and jelly as we are ... completely free. 


However, they're not terribly pretty. 


Especially with those glaring blue and yellow lids proclaiming that THIS WAS ONCE THE HOME OF PICKLED BEETS!!! (alright, I made the beets up. I've never bought picked beets in my life. I don't even know if you can pickle a beet...) 


So, after looking at the ugly lids for long enough, I decided to cover them with something pretty.


Here's what I did. 


I looked through my stash for some pretty fabric remnants that would look nice in my living room, grabbed my ugly-lidded jars, and these few other materials:


White glue,
Water
Flour
Sissors
Fabric Pen.


First I mixed up the flour (maybe a teaspoon or two), water (two teaspoons) and glue (about a teaspoon at first. then add more if it needs thickening). Until I got a good sticky paste to work with. Kind of like paper mache. I'm sure this would work with spray adhesive, or even some hot glue around the edges. But this is what we had on hand today. It looks watery in the picture, but it was actually pretty thick. Smooth, but thick. 


I traced the lids onto the fabric (being sure to mark the backside of the material). Then I measured about a half-inch around the circle I'd marked ( I eyeballed it... you could use a tape measure, I suppose). I cut out along the lines of the larger circle. 
With the paintbrush, I brushed a little glue over the top of the lid, and centered my fabric, fixing it to the lid, and being sure to smooth everything out as I went. (as you can tell, I didn't iron the material at all, so the smoothing was kind of important. Next time, ironing first. You learn as you go...)


Then I flipped the lid over, and, with some sharp scissors, cut slits in the extra fabric around the edges.


The edges were a little long, so i trimmed them up, applied some more of the paste to the edges (inside and outside) and folded the edge pieces in. 


Continued doing this all the way around. 


I set it to dry on a cookie cooling rack, and moved on to the next lid. 


Left them to dry for a few hours, and... 
viola!


What I would do differently next time:

Iron first. 
Double check the smoothness (see that wrinkle in the black one... grrr) 


But our marble jars are much improved, and nobody has to know just how many pickles this family eats. 
Tune in tomorrow to see how we use these jars EVERY DAY.

Glue and Giggles,
-shawnacy


Friday, April 8, 2011

In which we are saved from a grim and grisly fate by a package of party cups


We've been planning a fishing trip all week. Everyone has been super psyched. 
And then. 
We woke up this morning - last official day of spring break - to this kind of a day. 


I think it made it up to 20 degrees around 1pm. Major Bumming. 
The kids reluctantly donned their snow gear for some "FUN in the SNOW!" (I did my best enthusiastic mom thing... ), and went out to muck through the muddy ice. 
That lasted about 20 minutes. (approximately half the time it took me to find all the snow pants and coats and matching boots and mittens, and get them all dressed and out the door) 


And then, suddenly, we were looking at the business end of possibly the longest, most miserable day ever.


I wracked my mommy brain for some kind of fun cold-weather activity we haven't already done 3,584,695,212,800,000 times. (nothing came to mind)


So I let the boys build a fire in the fireplace. (they're getting pretty good at it by now) and I put on some hot chocolate. And for a while, we looked at books. 


Until the boys started arguing about something, and I had to negotiate a reconciliation. Which took forever. And then I looked at the clock at it was only 10:30. 
IN THE MORNING!!


So we pulled out the decks of cards and played go fish and speed and I taught the boys how to play war and solitaire. 


Which was great until war became more than just the name of the game. Nix the cards. ... after picking three decks up off the floor... and under the couch, and behind the bookshelves... sigh. 


LUNCH! 


Then naps for the girls... who weren't in the mood to nap, since we hadn't really done anything all morning. 


Temptation to turn on the Spongebob... growing with each passing second. 


Till I opened the cabinet under the sink to get out a clean dishtowel and spotted ... an unopened package of party cups. SALVATION. 


Now to some, an unopened package of party cups is just... well, an unopened package of party cups. But to a desperate mama, and her relentless pack of wolves lovely children, it's an unopened package of possibility and fun. I'm not even kidding. 


This entertained us ALL AFTERNOON. 


First, Owen decided he wanted to make the most gigantic pyramid of cups ever. 


It took a while. 

And a lot of tries. 


Like, 14.

But eventually, he (with the help of his brother) made it to the top. And placed the final piece.

They were so excited. Especially when I told them they could knock it down by throwing stuffed animals at it. 

As we were picking up all the cups, Max had an inspiration for a craft he wanted to make with the cups. It turned out pretty awesome, and he's here to tell you about it. Take it away, Max!


(transcribed by mom)  Hi. It's Max. I made a rocketship today out of these red cups my mom found under the sink. That's where she keeps the stuff we're not 'sposed to touch. 

This is what I used to make the Space ship. Three red cups, that thing from the paper towels, some clear tape, and some scissors. 


First, you have to take one of the cups and cut out the sides like this. The pieces you cut out are going to be the wings, so make them wing-shaped. Throw away the part that's in the picture. Mom, we should have taken a picture of the wings instead. Why did you take a picture of the trash part? (me: sorry.) 


You tape the wing parts to the side of one of the cups. You have to do this first before you put on the top cup. Mom, you don't have a picture of that part. *big sigh. (me: sorry.) Well, after you have the wings on - they need to be so they can move up and down... like wings. 

After that, you tape the top part on, but only tape where the wings aren't. otherwise they won't move. When you do all that, it should look like this:
And it's cool 'cause the wings stay up when you put them up because they get like stuck on the white part of the cup. The wings are 'sposed to be up when the rocket goes off. Then, after it's in space, you can put them down. 


animated gif maker


To make the rocket frushters... wait. What are they called? (me: thrusters) Thrusters, you cut off a piece of the tube. Then cut it so it opens up.


Then you have to cut in in half so you can have two... what are they again? (me: thrusters)  thrusters. I wanted to make four, but my mom said no. You should make four. That would be a lot better. (me: sorry.) 


Then you kind of roll the pieces up so they're smaller tubes and tape them so they can stay. Moooom! You didn't take a picture of that EITHER?! (me:... sorry.)
*Big sigh. Well, hopefully they know what I'm talking about. But then you tape the thr -thrusters to the bottom of the Rocketship. 

Here's a picture of what it looks like when it's done. MOM! Why did you have to put THAT picture on here? I look WEIRD! (me: ... sorry.) 


Well, just tell them to look at this instead. I like this movie. They can even see Logan on the couch. 
Is that it? (me: You could say goodbye.) Oh. Goodbye. I hope you make a rocket like mine 'cause it's really cool and I like it a lot. And kids can do it theirselves, too, so they won't always have to be bugging their moms.


make a gif
   {Make a gif}


Not to be outdone by his little brother, Owen made a little rocket ship of his own. No fancy cutting involved. 


They got out some guys and played with these for a good long time. Then they went online to check out stuff about real rockets and ended up on This Lego Rocket Game where you have to build a rocket and then launch it and see if it will make it into space. They all got really into it, and when their rocket finally made it 190,381 miles up, and the meteors were flying by, an impromptu conga line broke out and they were all dancing around the room singing 'We made it into space - yeah! We made it into space - yeah!' 


And so, we managed to survive the day thanks to some extra party cups and a little ingenuity. 
And we'll reschedule that fishing trip as soon as possible.

Thanks for Playing, folks.
Rhinos and Ranunculus,
-shawnacy


Learn how to make animated pictures Here. (it's a LOT easier than you think!)


linking up with:
Enhanced by Zemanta
Thanks, Max!!


Shibley Smiles


play academy

We Play
Photobucket

Monday, April 4, 2011

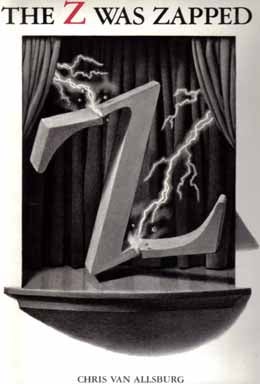
The Z Was Zapped, Yarn Letters, and The Alphabet Signs Song

I've mentioned before how much our family loves all of the Chris Van Allsburg books. (<-- Check out the link! His site is super cool!)
And when an idea popped into my head for an Alphabet Book craft, I couldn't think of a better book to use than his "play in 26 acts," The Z was Zapped


It's 26 of his intensely beautiful illustrations depicting each letter succumbing to an unfortunate demise.  Here are a few of the pages, to whet your curiosity.


So. After reading of the untimely end of the alphabet, we set out to create (rather than destroy) our own letters. 

I posted a letter craft on This edition of friday finds not too long ago, and was pretty excited to try it out. 


So, we rounded up some old wire hangers, 
a pair of wire snips,
a pair of pliers,
some tape,
glue,
and yarn.

I let the kids rummage through my stash, and pick out something that would make them happy. 

Then I set to work shaping the letters. I used my hands mostly, but brought the pliers in once or twice to make a neater corner, or flatten out the ends. 

Then I handed the letters (the first letter of each of their names) to the kids and helped them tie one end of the yarn to the letter at the topmost corner (or the closest I could get to the top, anyway) 

After that it was just a matter of wrapping the letters the way they wanted. (We used the glue on the sides to help keep the yarn in place.) This is where their personalities totally shone through. 

Max's letter was a beautiful mess. He also decided he wanted to attach an ink pen to the middle of his letter... (??) Odd things, bright red yarn, that, at the end, turned out looking like some sort of awesome spiderweb... that's my maxy. 


Annika's was neat and tidy. She got a little frustrated when the yarn got out of line, so I helped her get them all nice and straight. I love how hers kind of came out looking like a weird pair of pants. :)


And Owen spent most of the morning making his O into a rainbow-colored dreamcatcher. He wrapped the entire O in yarn, and then criss-crossed the yarn through the center to create the net-like part. Then he went out in the backyard to find some cool rocks, and hung those from the bottom of the creation. I love when the kids take a project and run with it!


While we were crafting, we made sure to talk about the letters, and their sounds, and to sing this little song alphabet song I made up to teach the signs for each of the letters. Signing the letters is very tactile, and it worked wonders with Owen and Max who have a hard time learning visually, when they were young. Here's the tune. (it's Jesus Loves Me) It incorporates the letter name, the sound, and the sign. 


** If you or your child don't know the signs for the letters, take a quick moment to learn. Not only is it helpful for learning the letters, but I use it almost every day when the kids ask me how to spell things. (They always seem to need to know how to spell 'hammerhead' or 'extreme' when I'm on the phone, or in the middle of a conversation. So I can just sign it to them, and reach a new totally awesome level of multitasking! Woo Hoo!!) 

Here's one final look at the letters hanging up in their new homes! 


Great Job Kiddos!


linking up to:

We Play


Shibley Smiles


play academy

Thursday, March 24, 2011

makin'stuff

this has been one of those weeks. in the middle of one of those months. 
one of the ones where there is JUST. TOO. MUCH. of everything. and nowhere near enough of the stuff you need in order to balance out all the rest of it. 


my solution?


make stuff. 


usually, i'd write, but since, at the moment, that's technically 'work' my brain tells me to shut that off and go cut and glue and sew and 'knid' and draw. 


so here's a little peek at what i've been doing when i'm putting off doing all the other stuff.


Repurposed Leg Warmers for Baby. 


i have had this blue turtleneck that i liked for the color and the softness, but HATED PAST THE POINT OF REASON for the turtleneck. i hate wearing turtlenecks. i feel like i'm being slowly asphyxiated all day long. sometimes i have trouble swallowing. or smiling. it's weird. but there you have it. turtlenecks are not for me. 


so, in a fit of frustration the other night, i decided to cut the turtleneck off and see how the shirt worked without it. 


it worked fine. :) 


i was about to toss the loathsome neck-piece into the trash with relish, when the crafty part of me whispered... why don't you make something out of that?


that whisper is hard to resist. 


so i've been wanting to make some leg warmers for Naomi for a while. "it's been a long, cold, lonely winter" as the song goes, and Namoi's poor little legs are chilly when she wears skirts or dresses. 


that ugly neck was destined to be cute legwarmers. 


so i cut the circle, so it formed a rectangle, and then cut the rectangle down the center, giving me two longer rectangles. (i wasn't sure how it would turn out, so i didn't take any pics of that part...)


but when i saw those two empty rectangles, i thought what a perfect opportunity this would be to jump into the lovely world of embroidery. 


not that i had any embroidery floss. or a proper needle. or a hoop... 
but it was just for practice anyway...


so i took out a sharpie and drew a little owl on one rectangle, and a teacup on the other. 


i'm not sure why owls and teacups should go together. but it seemed right at the time. 


the knit material was really thin and stretchy and hard to keep straight. 


this was how things looked at that point. 


also.. did i mention i don't have a sewing machine yet? well, it's coming, hopefully soon. but the lack of machine meant hand stitching the wrong sides together. 
i'm not the world's worst hand-stitcher... but i could be her understudy. 

this is how they looked after i'd stitched them up.


and because i like crocheting a whole lot more than i like hand-hemming, i decided these needed some crochet lace trim to finish off the bottoms. 

so i blanket stitched around the edges with the yarn, and connected the trim to the blanket stitch.


this is the ... 'finished' product. 


and here they are on the kiddo.


sorry for the horrible pics but it was a wiggly morning. she kept pulling them on and off and calling them her 'sockie-pants'
:)

they reach all the way up to her undies when they're pulled up, or can scrunch agreeably to any other size. i'll probably end up taking them in a little, as they tend to slip down after a while. she was asleep when i was making them, so i had to guesstimate on the size. 

but all in all, not a terrible project. probably a number of things i'd do differently for next time (like, use the right materials for the embroidery, have a sewing machine and measurements... etc) but for a throw-it-together-on-the-spur-of-the-moment project... well, Namo's legs are warm and cozy, so... mission... decently done. 


and because i got bitten by the embroidery bug, i decided to repurpose an old crib sheet that wasn't being used into some handkerchiefs for the kiddos. 
and homemade handkerchiefs just scream out to be embroidered. 

the first one i did, ... i used regular worsted weight yarn that i pulled apart to make a thinner string. it didn't work well. the threads kept ... just disintegrating. 
this was the first one, for Max. (he was the most keen on having his own hanky) 


still no sewing machine, so the edges are all unfinished. i was going to run around them with some pinking shears, but then i remembered, i don't have any of those either... grrr... i need a serious trip to the craft store. STAT!

i made annika's in the same way. she wanted a little kitty in the corner. 

and then i said, forget this, and sprang for a few bundles of embroidery floss, and a real needle. 

an owl and an octopus followed the cat.


and lastly, a little pink monkey, commissioned by Naomi. this one's not quite finished yet. 


oh, and i've been making these. 


56 delicious chocolate bomb cupcakes for Max's birthday tomorrow. they'll get decorated in the morning. 


these aren't shop-worthy, but the embroidery practice has been good, and so far the kids are pleased to get the results of my practicing. (especially with the cupcakes!)

what about you? 
what are you working on?
how do you drown your frustrations?
what new skill are you learning?